Monday 21 May 2012

Baptism card

Hello there
Well, what do you think? You like it?.... What?! You think it's a bit basic?! Not very decorative?! Rough and ready?!!
Honestly, what's a girl to do to please you lot?! ...... Hee hee, you'll be glad to hear that I haven't completely lost all my senses, as this is purely a dummy run for a card I'm making for a friend. Actually I need to make two, so I want to get them right. In fact the breaking news is that this was my very first commission, so the pressure was on. AND for a friend - no stress then?!!

On one of my Pinterest boards you'll see where I got the inspiration for this design; a Pinterest pin. I used the foil behind the cross on this little sample though because I had seen a different card design which included a metallic background but I didn't pin it, so then couldn't find it. The moral of this story is fairly obvious!
The original design just used a fancy shape to put the recipient's name onto and a butterfly. To my mind, that wasn't significant enough, so I chose an open book design instead, which I had to grab from t'internet and put into Word and then add the text. I did try using CraftArtist but for some reason it didn't 'like' the jpeg document and it appeared all blurred. I originally selected a verse from Matthew to put into the book, as it was about Jesus's baptism but my 'client' said that this verse from Deuteronomy was her preferred verse to display. So there it is. I had a debate as whether to ink or not to ink around the edges, which I even got 'him indoors' involved with. I decided to go without ink in the end, as the card mat below it is pink and therefore blends the book in, whereas it needed to be highlighted in my opinion.

The card blank was basically 6.5in square.

I had to get the cross shapes from ebay as I don't have the wedding Cricut cartridge they were created from..............
(There's another thing on my wish list and now that I've got myself a job, I might have more chance of getting it, although that salary is almost spent already and I'm a month off pay day)........
That placed me under pressure too as despite paying for them on 7th May, they didn't arrive until May 16th. Thankfully I had the foresight to make the majority of the card up, whilst waiting for the crosses to arrive.

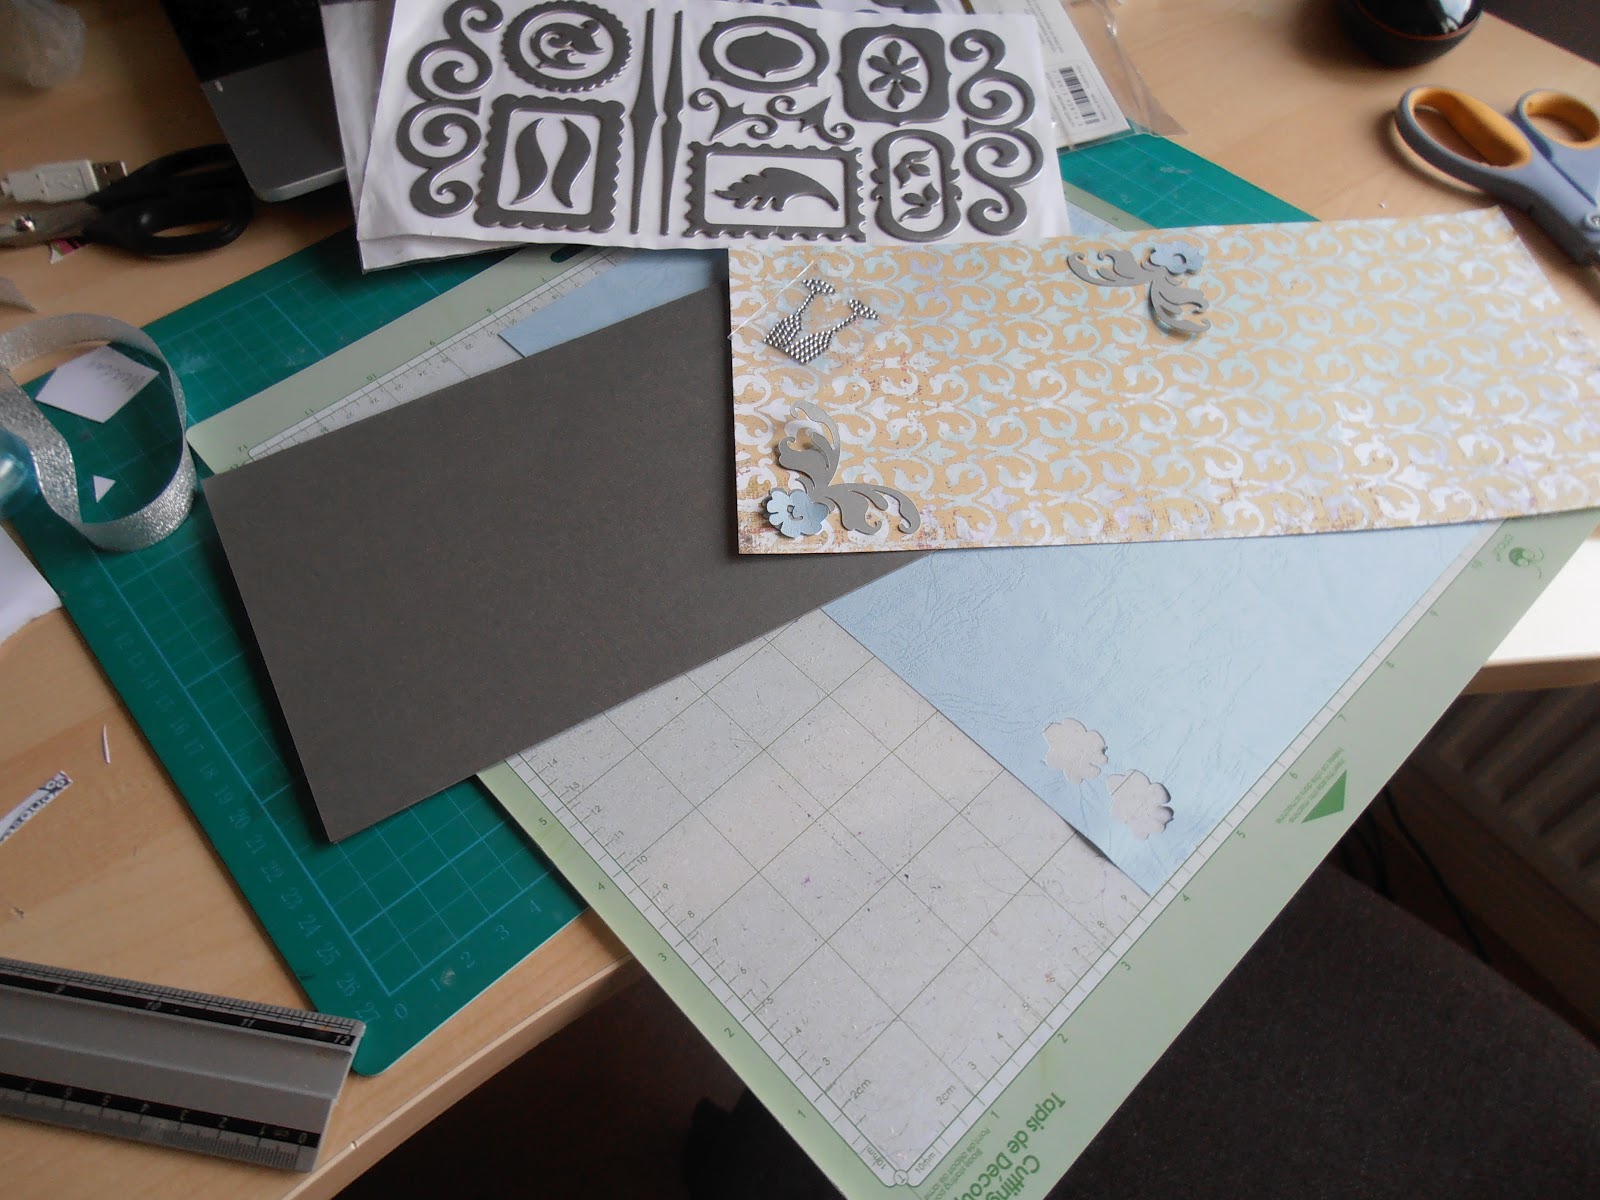
The decorative swirls were cut from Ornamental Iron2 cartridge - lace 2 function of gate 10c, size 2.833 (w) x 2.528 (h).

My next dilemma was, to blingify or not to blingify- yes I know, that's not really a word but just roll with it for my sake :-)  These cards are for two special ladies, so in my opinion blingifying is ESSENTIAL!

Bling free
Blinged

Hopefully you agree with me. I know they're only tiny but it's all in the detail!

Yet another decision I had to make was what to have on the envelope. I had created some extra swirly designs but in the end I decided upon shadow versions of the cross; which is of course the most important thing on this project.
Ta dah!
I hope that the ladies have a great event to remember forever.

Take care out there

Sunday 20 May 2012

The big four 0

Hello there

 I have a friend who probably wants to remain nameless, as her day of shame is upon us. She turns 40!!! I'm jealous though, as that was quite a few years ago for me.
I had to use the 6x6in Pink Paislee Spring Jubilee pad of course and from there the design came easily after seeing an album on their blog. That was for a wedding but I soon realised how to make it for Viki....oops! :-)

I do have to admit though that the butterfly (cut from Walk in my Garden cartridge) wasn't meant to face down like that. I cut it straight from the machine (not from CricutCraftroom) and did centre point but I had wanted it with the wings left and right; not top and bottom. I had also wanted it larger but I had forgotten what size I did my practise runs on, so it's my own fault for not writing things down. Not the end of the world though as I just had to re-arrange the layout from the numbers being inside the butterfly to them being placed underneath the butterfly.

I cut the numbers on the Cricut from grungeboard and white card too  (Plantin school book font) and glued the white numbers ontop of the grungeboard. See my previous post on how to do that. I then added glitter to make them 'pop'.


I definitely wanted to make more of an issue of the bunting, so I cut little triangles out from another sheet from the pad and used cherry red Baker's Twine to hang it across the top. I used a white Gellyroll pen to put faux stitching.

Before I mounted the main page onto the card blank with foam pads, I put some other paper from the pad under the butterfly space. I used the white pen for stitching marks inside the butterfly space, after mounting. You may notice that I also used the pen to write 'this person's name' onto the existing bunting on the paper.

I used my trimmer to create a scalloped edge on the card blank and then inked it with Stampin' Up's Regal Rose.

Inside the card I created more bunting so that I could put the 'Happy Birthday' message.

For the envelope I used the inner of the butterfly die-cut and glittered that too.


I hope that the card is enjoyed. I'm off out with her and some friends for dinner, so she'll soon tell me if she doesn't like it :-)

Here's another little 'movie' I've made of a few of the steps in making this. I really wish I could add music to this but I don't  have the right to play music I own in a public place which is sad:


Take care out there

Wednesday 16 May 2012

Birthday card

Hello there

This card was made using mostly the Ornamental Iron2 cartridge. It was relatively easy to do especially since I used the Cricut Craftroom software. The patterned paper I used was Bo Bunny's back to basics, Sophie stripe.

The various shape names and sizes are:
The first mat was green and called Gate15a, using lace1shadow at 13.69 x 13.76cm
The light pink mat was also gate15a cut with baseshadow- 14.01 x 13.79cm
The patterned paper was cut at 12.74 x 12.74.
The flower was cut at 5.64 x 5.26cm from Flower Shoppe
this looked so much better when I inked it

Then it was just a matter of putting them all in their place on the card.
I made the sentiment layers from the lace1shadow version of gate15a just sized down to 7.02 x 2.93 for the base layer and then 6.1 x 2.5cm for the top.

I finished the inside off with another pink lace1shadow mat so that it's easier to read the writing I'll put there.
I stamped the same sentiment on the envelope and inked that too to help it all 'go'.

Take care out there

Saturday 12 May 2012

My mum is 70

Hello there
Yes, my mum is now 70 but she's very lucky in that she doesn't look it - me and my sisters can only hope it's in the genes, although some days I think I look older than that already!
One of the things I did for her was make a cushion cover. It can't be classed as a present as such though, as she chose and paid for the material but I finally got my act together and made it in time to give her on the day. I have a range of old missmatched cushion covers in this lounge, which is inexcusable really as they can be so easy to make and make such a difference to a room.

I found a quick way to get the size of the circular cushion cover on the patternreview website, so that was quick and easy and I just did overlap closure.

I used the 'large' Clover yo-yo template. They don't turn out to be what I would call large but suppose they are bigger than the small. I'm not 100% enamoured with them but they just worked out ok with the material I had. You get a full set of instructions with them but I've made a few alterations to make them work for me.
    Don't use the same colour thread as the fabric,
 as I find it gets lost, making it hard to keep track
of where you're up to. This thread is a perfect match,
which ironically made it totally 'imperfect'.
 
I marked the starting point on the plate because despite
 the fact that you need to superimpose the last stitch over the first one,
 I find it quicker to know exactly which is the first one,
 rather than relying on memory.

I found the centre sewing to be annoying with the application
I was doing, as the back hole buttons didn't fit in nicely,
to the middle,so I left that out with the last two flowers.

One flower definitely wasn't enough though, since it's the same fabric as the cushion cover, so I did three in the end.


I'm still not happy about the shape of the cover as I should've added the 'belt' I made for it to put between the top and bottom layer. I may well pinch the cushion off mum to add that at a later date.

Take care out there

Friday 11 May 2012

A very special lady

Hello there
Quite a few people I know have birthdays in May. My mum is one of them. This year is particularly important for her though as she has a milestone birthday. She'd love for me to be able to say that she's turning 21 but I'm afraid I can't. My mum is turning 70. My two sisters and I have planned a great day for her on May 25th but I can't tell you about that until after the day of course, as it's all still a big secret from my mum. It's also my step-dad George's 80th this year, so it's a joint birthday for them really.

Today I've just been sorting out wrapping the little fun present I've got her for an 'unwrap' on the day; May 10th. It's some Cherry B bottles - I can't possibly tell you why :-)  Maggie also got her a present, so we wrapped that together.


I made some 'tags' for the gift bags using Plantin School book cartridge for the numerals and Walk in my Garden cartridge for the flowers; using the blackout function of daisy2. I think they really 'make' the bags.


The card I made during a class I went to with Melanie Heaton at Inspirations store in Preston. Please visit Mel's blog to see the full set of instructions on how we made it. It's a gorgeous card and I had fun making it with some lovely ladies in the class and I'm finally getting to give it to mum as I always had wanted to do.


I had to make a box as an envelope as this is very dimensional. I also embossed a flower design onto the lid of the box using a design on the Ultimate Pro. I then embossed a smaller size of the same flower in a coordinating card stock piece and cut it out. I then adhered that inside the embossed flower and it will get used as a place to write my mum's name on the envelope/box.


I've also made another box to put the important documents in for the other special day on May 25th. I used the 'magic ruler' method to make the custom sized box with my Ultimate Pro. I used the 1inch size. I then cut two triangle shaped pieces from some K&Co paper to decorate the lid.                                     


I'm collecting her birthday cake tomorrow night from my friend Viki who has made it - you really should check out her cakes as they're amazing - Viki's Cakes and bakes

Take care out there

Friday 4 May 2012

Are you relaxed?

Hello there

My daughter often is relaxed. Sometimes, as her mother, I find that annoying when I need her to do things but at other times, it really is an endearing aspect of her character.

What does that photo have to do with my daughter, I can almost hear you say. Well, follow this post and all will be revealed.

It's the last week of the FieldGuide for the Curious Scrapbookers' class I've been doing. One of the last two videos shows May completing a L.O using all the techniques we've covered in class. I want to do this I thought straight away. Around the same time I saw a great article on Sarah's cards blog about using hexagons. There's a great link on there to a site which creates custom sized and coloured hexagon templates, so it's well worth a visit.

Good times glueing foil onto card and embossing it and then inking it. You have to try it yourself to understand :-)
Once I'd cut my larger hexagons out, I realised that I had created a wonderful template, which was just calling out to be used. Since the colours I was using was pink, greens and blues, it was genius as I have a blue pre-made mist ready to go, so off I went.
This was my practise go

I did a rough sketch of how I intended to lay everything out; placing hexagons next to each other etc. I misted three of these vertical row of hexagons template as I had three photos.
Another criteria I set myself was to use the Pink Paislee Spring Jubilee papers, especially since this was a L.O about having fun in the sunshine and outdoors in the Spring. Besides, I don't need an excuse to use it; I just do because I can because I love it! I must get some stamps to go with it and possibly some of my extra fave pages in 12x12 size.
Another stipulation I gave myself was to give using foil a go. I hadn't done it before and it was great fun; especially the embossing with the leaves folder - I love it when I find something like that which matches perfectly with what I'm doing. I went overboard with the foil really as it doesn't really match the subject but hey ho, I had fun, so who cares?!  :-)
The doodling in various places was good fun too
The one thing I noticed about this L.O was the speed at which it happened. It was far from break-neck but it was fairly smooth sailing over a comparatively short space of time. This really pleased me too, as that's a goal of mine this year.
Now you can see Maggie relaxed after a 'tough' walk up the hill. She's such a diamond gem for making me go that day. She's a treasure indeed.

Take care out there

Thursday 3 May 2012

A new baby

Hello there

Not long ago you may remember I made my very first mini-album for a friend who was due her very first bay -check it out here. Well that expected baby is now a little girl called Nicole who was born on April 25th. I've made a card which I had great fun making because I covered it with pink lushusness :-) Weather is foul here with loads of rain, so the lightness and freshness of pink was just what I wanted. My sisters didn't understand at all, as I sent them a photo of the papers via Whatsapp and they just thought I'd lost it. Maybe I have but boy am I enjoying being 'lost' :-)

Once I knew the basic papers and bits and bobs I was going to use, then I had to decide on images. I looked through some Cricut mags for inspiration and found it. That card though had the most gorgeous baby shoes on it but I don't have that on any of those on my cartridges or anywhere else. More research found a gorgeous little bird house and bird on the Create a critter cartridge. So there, I had my ideas. I put a very basic sketch down on paper, using my papers as a guide too and the size of the doily.

Look how tiny the letters were that I cut out once on card and then once with patterned paper, as I wanted them thick enough to stand their own ground, so to speak.


Because of the size the card needed to be to fit the doily on, I decided not to make it a traditional card folded in half card. I had some very light pink ribbon left over from sewing class I went to last week and it was perfect for this card and plenty long enough luckily. I just love how that happens sometimes - small items I keep, actually end up being just right for a project which may have been spoilt without it.
Just remember, if you want to try this, please leave a gap between the two card pieces or you won't be able to open it and it won't stand up properly.

To colour the foam 'Serendipity' thickers I stamped the Regal Rose stamp onto the mat and then flicked some water at it and used the blender to paint it.

I cut two 7.5in square card blanks, I placed them together; wrong sides together and punched two holes in the left hand side and threaded the ribbon through and tied a pretty bow. I then added all the layers and came up with this:

That's not true really as I didn't have the heart shapes at first but I found a sheet of card which had previously had a pile of hearts cut out of it, so it formed a kind of stencil, so I used it as one and I'm so glad it did. Layers, darling; it's all in the layers!


Here's a little something different for you to look at :

Take care out there Nicole and live a long and happy life surrounded by your loving family

Wednesday 2 May 2012

The other Silver Anniversary card

Hello there

In my previous post I showed you the Silver Anniversary card I made for a friend. This is the one I made after that due to my lack of confidence and belief in myself basically. You never know when you might need a Silver Anniversary card as well :-) Stocking up on cards is something I don't do anywhere near enough of.
Once I'd collected some things together and got some inspiration, off I went and before I knew it was all done. It all just flowed really nicely and gave me back confidence that I wasn't 'losing it'.
I used a A4 card folded to make an A5. I cut the My Mind's Eye paper as a mat. Found some other silver shaded card to cut the corners (corner3)from Ornamental Iron2 cartridge at 2in and then cut the flower head in a light blue paper.
The numbers were also cut from Ornamental Iron2 -gate2a and gate5a. I can't remember what size I did them, I'm sorry.  I'd suggest using scrap paper to cut with first, then you can adjust the size and see for 'real' whether they look good or not on the layout.

The mat for the numbers was cut at 3.5in from Plantin Schoolbook. I handcut the mat for the glasses, so I've no idea what size that was - I just cut the card with the glasses in place, so that I knew how big to cut it. I inked all the edges of the mats and the sentiment label with silver, which isn't all that noticeable but it's all in the detail, as they say!


The sentiment was written in CraftArtist using the Cupid and hearts kit and printed on the same blue paper as the flower heads.
I also put a patterned paper with silver card mat inside the card, as it's double sided card and far too dark a colour to be able to write the wishes on
The envelope was made with my Ultimate Pro and the frame was from a pack of American Crafts thickers over a blue paper background; again necessary due to the patterned paper of the envelope.
This makes it look green but it wasn't - the colours were bluey silver throughout
I wonder which one you would chose.

Take care out there

Sometimes I wonder why I bother ...

... and then something just snaps and I KNOW why I bother; 'cos I love it!

Hello there

This morning for example I had a real faff (that means 'a hard time' for all those who don't understand that colloquism) with trying to make an envelope. Nothing was working and even when I tried printing with MyCraftStudio, it kept printing it A6 when I wanted it A4. When I finally phoned up, I was told that Microsoft's latest update has affected alot of software users in this way. The advice given was to 'print to file' and then print from there but my computer was having none of it. I even downloaded a template from '4shared' but that wasn't 5.5in square either despite what it was advertised as.

Sometimes I wonder why I bother with computers but then our lives are so embroiled in them, it's extremely difficult to forget about them. In my crafting, my computer can be extremely useful for printing allsorts of things; using CricutCraftRoom and getting inspiration and instruction too. There are times, I'd gladly throw it out of the window though.

Had enough of my ramblings about computers? Don't blame you. Let's move on.
I had wanted to use some papers out of a special edition 'Weddings' magazine that 'Cardmaking and Papercraft' did last year I think it was but very annoyingly I couldn't find it. They do have a wide selection online that you can download but those were amongst them, of course! I did find this loveheart paper though which I think it quite pretty. I then did a basic layout of what I wanted my card to look like and got printing and searching for stuff in my room.

By the way, the theme for this card is SILVER WEDDING!

It's actually my very very first commission (aaargghh scary!). It's an order from a friend for a friend, so I hope and pray that they both like it.


I cut circles out of the two patterned papers I chose - the largest ones (4)were 2.5in and the smaller scalloped circles (4)were 1.75in. An extra 2.5in circle needs to be cut from card to form a base for the quartered flower I made with the circles. I also put the larger ones through a swiss dots embossing folder to link in with the dots on the design. You just fold the circles in half and then in half again and then glue them onto the card base.
None inked = boring
Inked = now you're talking!


The card blank was cut with Cricutcraftroom in order for it to join properly - flower1 at 15.42 x 28.75 (then folded in half) from Sweet Treats cartridge.
The first mat (dotty mirri board) - 13.48 x 13.55
The top mat - 11.5 x 11.5
Add a button; embroidery thread twirled within an inch of it's life; some text created in CraftArtist; an insert which took me far too long to import into CraftArtist from being a pdf and then fading and you end up with an anniversary card.

 Then came the envelope antics but I got it sorted finally with a few adjustments of measurements using my Ultimate Pro. Before you suggest it, yes I did keep a template. I used to have a few but they've got lost with the house moves. With some cutting out of hearts from the paper as well and hey presto, an envelope appears.


After making that though, I was nervous about whether it would be liked and because I'd had so much bother with it, I decided to make another different card. That post is for another time.

Until then.. take care out there

Tuesday 1 May 2012

Card for Chris

Hello there

It's that time of year again when Chris ages one more year. That's right; it's his birthday. Chris is my partner for the record. He's a nightmare to make a card for or buy a present for. He's so blinkin' fussy. Just take my word for it.
I decided to make him a card with this plane decoupage on it, as he used to love watching planes in his youth and I have a kit with lots of images suitable for men, so suited this situation just fine.
I had some trouble with the foam 'serendipity' thickers. On a baby card I've done recently, I also used them but on that card, I mixed the stamp pad ink with water on the craft mat first before applying the colour with a brush. I can only pray that the ink on those letters stays on, as I've posted it now.
On this one I just rubbed the stamp pad across the letters in the name of experimentation.
I noticed whilst getting the envelope sorted out that the ink came off on my fingers, even after quite some time. I wasn't sure what to do about the issue and since I had already adhered the letters to the card I emailed May Flaum, as my BPC teacher, for suggestions on what to do. She suggested using Glossy accents to trap the colour in. I did that and of course it worked a treat - thanks May!
They look much glossier and more intense colour than
 this in real life, which is good
May has shown allsorts of inking and colouring methods during class, so I'm glad I've been playing around with doing the same thing and even think like that when buying things. For example these thickers. Normally I would've chosen the coloured ones but instead, I bought the white ones as I thought they'd be great for colouring whatever colour I need for the project.
Take care out there
Related Posts Plugin for WordPress, Blogger...