Wednesday 30 January 2013

Scary stuff

Hello there

Tonight I've spent some happy times with my crafty girlfriends using a pack Catherine made up using elements of the Stampin' Up Afternoon Daydreams simply scrappin' kit. There are some really lovely elements in there and the papers are pretty gorgeous too.
Catherine had designed three cards for us and a scrapbook layout. I didn't get to start on the layout but I can do that tomorrow. 

The scary part was the brayering, which I've only done once before. Once you get the need to be gentle with the brayer though; roll from off the cardstock and roll off at least once before using it, it's quite an easy process really. You need to know which colours to use together to get the invisible link between them and Catherine is excellent at that and oh, so patient, hence I was able to get great effects. 

This is just such a moody image but the embossed 'pool party' card and the colours of the patterned papers and the sentiment with the ribbon, all help to bring 'it out'.  The twine help to 'ground' the trees too. Catherine's a very clever girl.


I think this is my best one with the sun in exactly the right place.
My brayering was rather heavy handed on this but I still love the
effect.

Look at the way that sun sits so well behind the branches-
pretty as a picture! 


I am so pleased with these cards and I'm so lucky to have talented friends who don't mind sharing their skills with me.

Take care out there

Tuesday 29 January 2013

My winnings

Hello there

I won these on a Tando blog hop recently. How cool is it to win so many things that you
love just for looking at design team entries, which are mega inspiring?!!

My daughter asked me recently to make a frame for her latest drawing.

It just so happens that a backing and an Arabian arch fit perfectly around her  drawing.
I got to playing around tonight with paint and some heart balsa wood embellishments

The arch looks even better with the gold paint dabbed on. I'm
going to leave it to dry and see whether I should've put gesso on the  chipboard
before painting. No problem if that's the case, as I'll just
turn it over
Yee hah! I spy fun times ahead with this little project.

Take care out there

Monday 28 January 2013

Time

Hello there

Tonight I've actually managed to get some crafting done! Last week was awful with my daughter in hospital or very ill at home, so I either didn't have the time or I just couldn't focus on crafting. Thankfully, she seems fully recovered now, so life is getting back to normality now. Change is nice but we can do without that sort of change.

I had intended on doing a friend; Catherine's sketch as appears on her blog but I couldn't remember the date she'd posted about it and by the time I got round to asking and finding out, I had already got underway with some die-cut remains from a couple of weeks ago. Yes, stuff sits on my desk for a long time, even if I do have to clean it around when my mum comes to stay for the weekend :-) Catherine has set up a monthly challenge of creating a sketch and getting her readers to interpret it and share with her. My sketch for her will have to wait for another day now - that's no problem, as Catherine is used to me being slow. Head on over there (after reading this of course) and have a go yourself.

If you saw my last post, you'll recognise elements of this page, as they're the same as I used on that scrapbook page i.e the stamp die-cuts and stencil and the postcard from the Steampunk digikit designed by Sarah Hurley for CraftArtist.
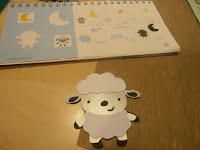
I've also added a gorgeous little sheep from Create A Critter cartridge.
I had to do this as the top photo shows a field, which actually had sheep in it, who got out of the field when we were there - very funny and not dangerous, as I think there's only about 5 cars on the whole island of Muck. It's gorgeous!
I used the stencil from the sheep die-cut and created almost little shadows of him in the right hand corner under the title. I love fun little elements like that, which are impromptu ideas, off the cuff, so to speak. 
The font of the title is 'loop de loo' from the Lyrical Letters cartridge - I sized it on Cricutcraftroom.


The bird tag is from a kit I have and there's that postcard again. I also used some Tim Holtz tissue tape in a couple of places on the page, as I thought that they fitted the theme really well.

Well, I did enjoy that. A stress free, productive yet relaxing evening. Don't mind if I do! :-)

Take care out there

Friday 18 January 2013

Freebies

Hello there

Last week on Cricutcraftroom they had another pile of free images on there just for a week; every week there's a different cartridge/range of images that you can cut for free. I didn't like the actual images they had on there but my eye was caught by the photo mats, which have the slits cut out for you to fit your photo/topper in. So I got to cut out a pile of left over card in a couple of colours. Today's layout uses the cut outs and the negatives from that. 

I got my layout inspiration from a Basically bare blog entry. Although after saying that I just went with the creative flow really with the materials I wanted to use and what I have/found, which I find to be so satisfying.
I wonder if you noticed the dribbles again - my Stampin' Up ink
is going to get lots of use, me thinks! :-)
I had intended on using some wire to replicate the swirls on the float but whilst I was searching for it (I still haven't found it!) I came across this punch; I keep them at the back of a shelf as I don't really like them but oh boy, was I pleased to find this one at this time - it was meant to be! :-)
Yet again, I used the cut outs, and the negative and I also used sections of the die-cut as a stencil for the background. The only reason I used the top right hand corner negative piece though, was to cover the spraying mistake I made there. Happy accident!


Sarah Hurley and Serif also saved the day with the postcard from her digikit on Daisytrail which I found whilst looking for a postcard on CraftArtist.


Yay- another great creative morning!
Now to wait for the text from the school saying that it's closing due to the snow. Some schools have shut already but thankfully my daughter's school aren't soft!! ;-)

Take care out there in whatever weather you have, as I know that Sydney have had over 45 degrees today, so that won't be any fun either, as it can cause bushfires.

Wednesday 16 January 2013

Is this enough?

Hello there

What a morning I've had. I've been sat up here in my little room after a good long walk with the dogs, on a very cold January morning in the U.K. with tiny bits of sunshine thrown in. I've been watching Louise Nelson again but on Vimeo this time, as I watched her Jumpstart 2013 video last night and was so inspired by her style and Debby Lewis's take on her video too, that I had to create myself. I've probably said this before but so often I just get inspired and then that's it. Just sat in front of the computer getting inspired. How is that inspired? It only works if I actually get off my bottom and create. So guess what? I actually got off my bottom! :-)

I got a piece of packaging chipboard and coated it with gesso. I was even enough on the ball to remember to cut it down to 8x8in, so it'll fit in the album I want it to go in. How good is that?!! :-)

The next step has loads of layers, in a practical sense as well as in the layout sense. I spritzed, masked, blobbed and dripped all over the place. Although, no, not all over the place, as I purposefully tried to keep most of the design in the bottom right hand corner. 
It would be rude not to add some Perfect Pearls mist  :-)

Some crude banners I made by just rubbing some
ink onto some left over packaging material

Louise's main focus in the Jumpstart video is crackle paint
and the different products available to do it. I used a blue
Ranger one, as it's the only one I have!


This is a lovely mask but I really wish it was a stencil- the
negative of it is clear plastic, so I find it too hard to use.
I love the finished result, other than that stupid base banner - dozy me placed it too far out, so I had
to cut it down and made a hash of it :-(
To answer my original question; yes this is more than enough for me. It's nowhere near as good as the other members of the Creative Jumpstart but we're all at different places on our creative journeys, so I'm happy.

Take care out there

Sunday 13 January 2013

A blue wreath

Hello there

Here's a quick little post just to show the last wreath I made. I made it for one of my sister's at Christmas. 

I used an absolute gorgeous paper pad by Tilda called Summer Blues. I absolutely love the double sided patterns on the papers and it's such good quality.


The bow took me ages of watching youtube videos as Mel Heaton had helped me to make the last one and I couldn't remember how to do it.


I wish I'd got round to inking the edges of the
flower centres before adhering the
flowers together


My sister lives overseas, so it was a bit of a rush job to get it done in time to allow for postage times. As it turns out, it was actually delivered to her on Christmas day, so her living in a non Christian country has it's benefits.

I'm hoping that the next one I make will be relatively easy now but I'm not holding my breath.

Take care out there

Friday 11 January 2013

I'm not convinced

Hello there

Over on Creative Jumpstart 2013, Nathalie Kalbach shows a technique on video 13. Nathalie shows stamping on printer transparency paper. "Ok", I hear you say, "big deal!"
But Nathalie stamps using gesso. Yes, you read correctly; gesso. She uses a background stamp and shows how to make sure that your stamp is damp to start off with and when she uses Liquitex white gesso (which is runnier than others), it works, basically fine.


Right, for me to get on with it, NOW! I haven't even brushed my teeth yet and it's 09.30 but I am dressed :-) I love grabbing the bull by the horns and going with the flow. I had a couple of issues though, in that a) I don't have Liquitex white gesso and b) I don't have any printer transparencies but hey, since when has not having all the equipment ever stopped me?! :-)
I used Claudine Hellmuth's gesso and some acetate instead.

For those who don't know, gesso dries hard, quickly! So there is potential here to ruin a stamp if it dries thick in the recesses of your stamp.


After selecting a stamp that I wouldn't be heartbroken to lose, I get dampening it and then putting gesso on my craft mat and dabbing with a sponge and placing onto my stamp and then of course, onto the surface to be stamped.

As you can see, the results weren't amazing to say the least. I had thought before I started that I couldn't see the difference between using white gesso and using white stamping ink or embossing powder and I was proved right. I possibly used too much water to dilute the gesso etc but I'm not going to do anymore as it doesn't create enough of a difference in my opinion. I also tried it on some dark blue paper stock but it was no better on there. 

Take care out there and go grab a bull! 

Wednesday 9 January 2013

I'm a complete Jumpstart!

Hello there

This is my first post using Google Chrome. I was having no end of trouble getting photos to upload on Blogger, so this was an option suggested to help that issue on the help and support pages. I've also worked out how to install icloud and use it's photo stream facility, which makes photo storage so much easier. Now all photos will be available in one place wire-lessly connected,  rather than over several different machines, needing cables to attach each one. Listen to me - real techy wizz! :-)

Not only have I been doing techy things, I've also been playing with gel mediums and alcohol sprays. This happened as a result of watching Creative Jump-start No.10 video by Nathalie Kalbach herself. It's a very basic video about using gel mediums as a resist. I've seen it all before but it is a good technique to use in this sort of project, which is designed to jump start people's creativity at this dull time of year (it's definitely dull in the U.K) 
A practise piece on copy paper over the Tim Holtz
flourish mask. It's looks so glimmery under the
light here on my desk, as the mist has SU's champagne mist in it
I've still not finished all the calendar pages for this year yet, so I played around with the  Claudine Hellmuth gloss medium on another month's page. Despite having seen May Flaum and others use mediums tonnes of times, I haven't actually played with it at all really. I created the stencils by cutting shapes with my Cricut out of acetate. 


The completed page for August

I was really chuffed to find this shape, which is perfect to use as a stencil.
It's a shape from the Don Juan cartridge, which I don't own but
it's the free cartridge available on Cricutcraftroom this week. 

I do love the glimmery effect the champagne mist gives to projects.
Glimmer without glitter is a definite 'yes, yes' in my book :-)

I haven't got a brilliant look on the stencilling but considering
they were created by all handmade items, I'm very happy with it.
It looks much better in real life too, I have to say.
Take care out there

Friday 4 January 2013

I've had a right good kick

Hello there

As some of you may know (if you read my last post), I'm taking part in a project which intends to give crafters a creative jumpstart this month. I'm also in the middle of doing this year's calendar still. Today, the two events combined, along with a third event. The third event was a shopping trip to Crabapplecrafts, which is a local craft shop, where I spent some Christmas money. One of the things I bought was an IndigoBlu stamp set, as it includes the saying about dancing as if no one is watching, which I love.

The technique is presented in the second video on the site; Heidi Swapp does this one. In a nutshell, Heidi shows us an idea to use her Color Magic mists (I don't have any, so made up my own with SU reinker, alcohol and water). It simply involves misting over a stencil which has been covered with a mask and then stamping over the mask. I really like the effect Heidi created.

I'm also happy with my result because I enjoyed playing around with my new toy and technique and also chatting on the computer with some crafty friends about a catch up date we've organised for tomorrow night.

It's been a good day, as it has definitely helped to give me a kickstart with creating things in 2013.

Take care out there

p.s
I case you're wondering; the calendar section goes on a separate sheet of card below this photo page but I'm pretty certain that none of you want to see a family planner calendar page :-)

p.s.s
This post is a day late being published, courtesy of Blogger on the ipad as well as their app not being effective for inserting photos. Grumble, grumble, moan, moan but the upside is that my crafty friends get together isn't tomorrow night, it's tonight!! Yay!!

Wednesday 2 January 2013

Here we go, here we go, here we go now!

Hello there

Only those of you who had their youth at the same time as me, might recognise the lyrics I've pinched in my post title. Hopefully Gloria Estafan doesn't mind. But indeed, here we go with 2013 on my crafty journey.

Happy New Year firstly to those of you who didn't get to read my last post from 2012. I hope this post finds you well and happy but if not, I hope reading through creative blogs is helping you feel a bit better and hopefully inspired to have a little go at something fun. I'm having a busy old time as ever but haven't had any chance to do anything much creative, other than my endeavours with this year's calendar. I make our family calendar every year. January's page isn't brilliant and I'm doubting neither will any of the other pages, as time has run away from me and energy levels have left me uninspired with it. I'm not going to stress about that though. I'll try to get it finished this week and then I can move on with other things which are feeling more interesting at the moment.

I've joined Nathalie Kalbach's Creative Jumpstart 2013.  It aims to give a tutorial video every day in January to inspire you at this time of year, when perhaps you're feeling slightly 'de-mojo'd'. There are also giveaways apparently, which is always a good draw for me. She's got loads of famous names like Heidi Swap and Dina Wakely to do videos, so I thought it'd be worth a shot. I watched the video from yesterday, today and it has a great little technique using embossing powders and double sided tape which I'd never seen before. Sign up for the event yourself and see what you think.

You start off by putting some strips of double sided tape onto your craft mat and rub embossing powders onto it and then heat it. If you only pull off sections of a the tape backing at a time, you can create multi coloured tape.

I got embossing powder all over the place and alot of it stuck on my mat but I loved it as an idea.

I had to do something with the technique straight away, as that's the idea of the videos and too often, I just look at good techniques and never actually end up using them. I seemed to instantly think of the moleskine I have from over a year ago now. It's from a class by Kirsty Wiseman and I've never touched it.

Once I got started tonight though, I just 'got into the groove' and finished off the whole cover and back of the booklet; the title of the moleskin wraps round from the back.

I used some lovely lace and some Debbi Moore 'metal magic' embossing powder too, along with trying the technique on foam pads too with limited success but I put them on the cover all the same.
Ok, so the technique didn't work very well for me but at least it got me playing and finally doing something with the 'me' moleskin.

Take care out there and play whenever you can.
Related Posts Plugin for WordPress, Blogger...