Saturday 29 June 2013

My Mags

Hello there

My Mags is my daughter; Maggie. She's been an absolute treasure this past week when I've been feeling low. She's had two days off school too what with a strike and then an INSET day. Chris has been away, so it's been just the two of us. She's been happy to help me do jobs around the house, cried with me watching 'Up' and walked in the rain taking the dogs. She's such a life source sometimes. I can talk to her and i know there's a definite way forward.

Today I went to a local craft shop who are having  a 50% sale. I managed to get a few bargains; one of which was a stencil of sun rays, which I've been after for a long while and always struggle with the cost of them i.e validating the cost. This was £5 at half price, so I can live with that. I wanted to play, so I went to one of my journals, mixed some matte medium with some SU daffodil delight re-inker and splodged it over the stencil. I did some extra brushing to make the ends more frayed than angled. I wanted to also try misting through it, so I jolly well did! :-) I did it in a way which brings the two pages together. I then found some bits off my desk to use. I decided to try inking inside an embossing folder again, as I'd tried that at Catherine's house on Wednesday but failed miserably. It worked a treat today thankfully. I used my heat gun over the edges of some white spider's web to make it wrinkly and then rubbed a distress ink pad over it to get the colour I wanted.

A bit of journalling and doodling and job's a good 'un! 

These sorts of pages are a mixture of me messing about with stuff I want to and me releasing feelings. I have to have enough time and inclination to do them but I do love it when I do. This came together very quickly, so that made me happy too.


Whilst doing that I was also helping Maggie to do a sketch book she's making ready for a trip she's taking with school to Vienna. She's getting really into it, so we're having fun together doing that.


That image is a sellotape transfer of a printed image.
She'd done something similar in school and
wanted to try it - we're both really chuffed
with how it turned out.

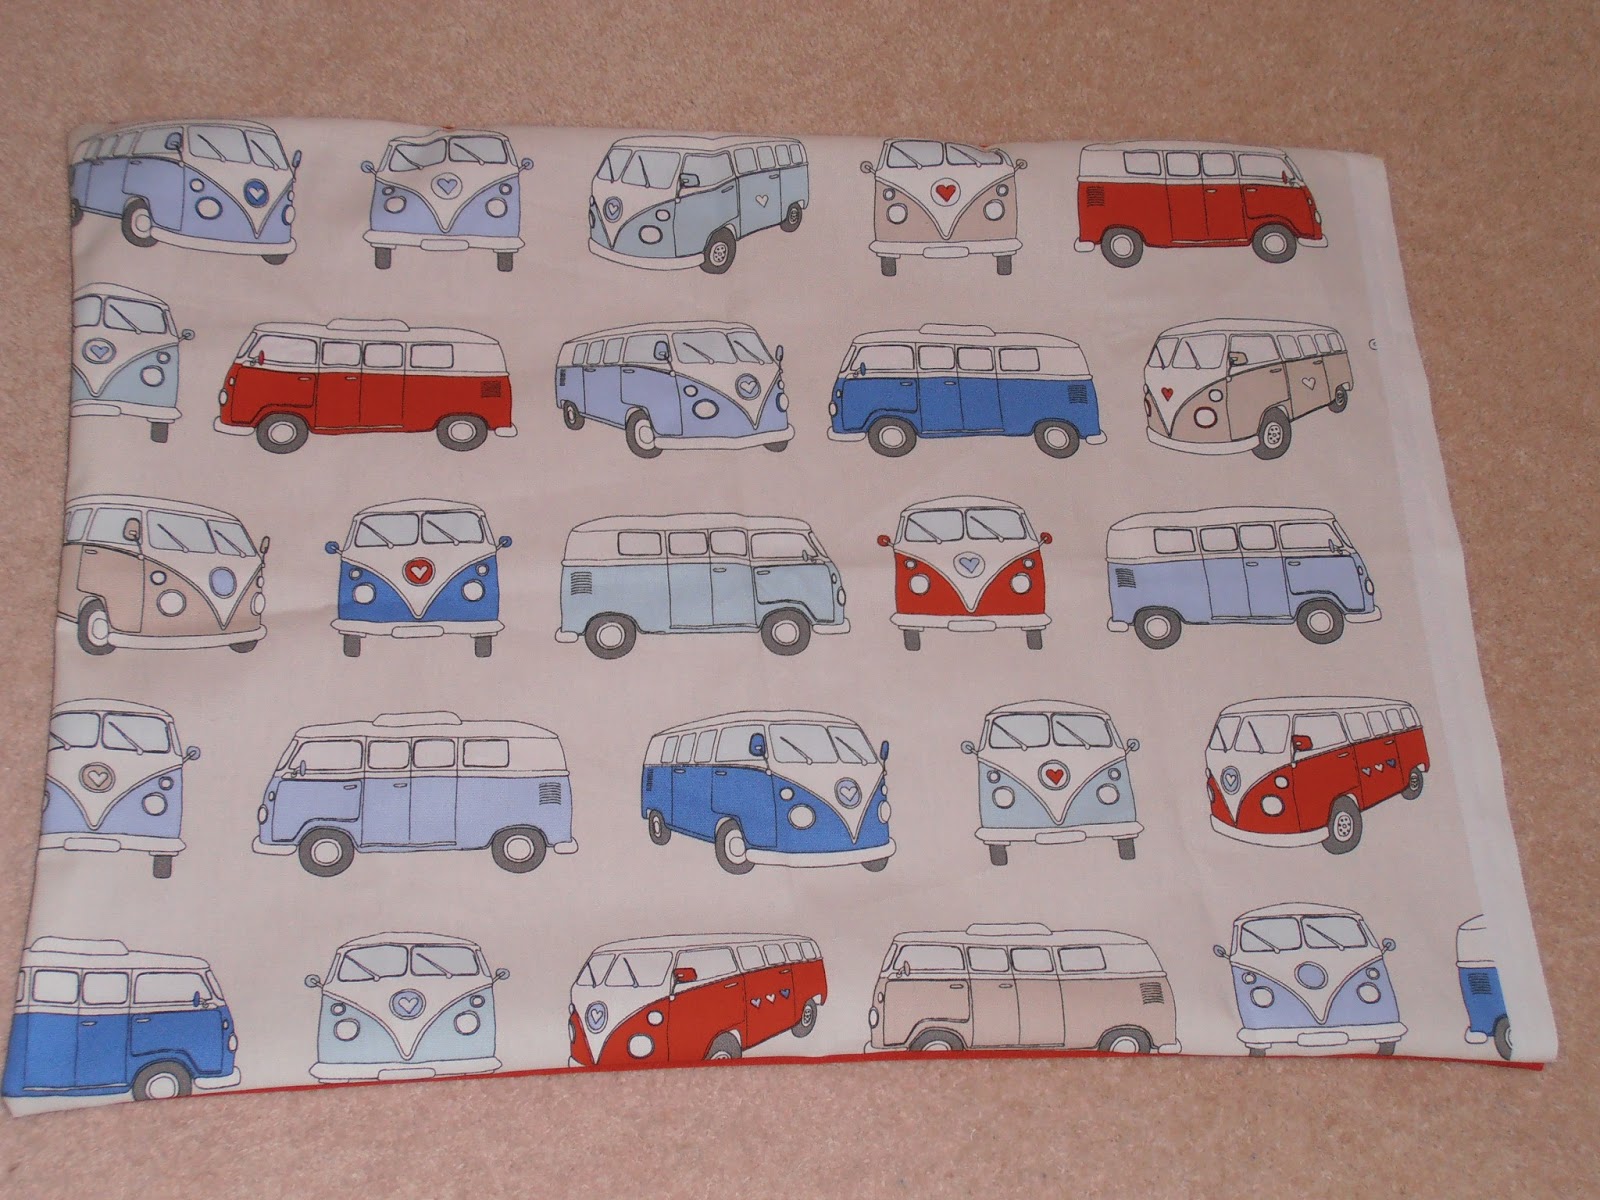
I know I promised a final post about my patchwork cushion cover but I haven't actually managed to get it done yet, as I needed to go and get the backing fabric today, so it'll happen and you'll be the first to know :-)

In the meantime, take care out there.

Wednesday 26 June 2013

Continuation

Hello there

For the ones of you out there with good memories, unlike my good self, you will know that I had been creating patchwork squares not so long ago. I haven't forgotten about these; well how could I, when the pieces of the last one have been lying on my desk tormenting me?! 

Today I've decided to get back to that cushion cover project and finish the last block. It's called a Temperance block in America and since that's where the presenter; Kaye England, of the Craftsy class I signed up for, comes from, that's exactly what I know it as. If any British patch-workers know it as something else, please do enlighten me.

The letter T's are fairly obvious and they clearly symbolize the Temperance movement initial letter. I can reassure them that no alcohol was consumed during the making of this block. Although if you saw the back of this block you may argue that I'm lying, as it's far from perfect but my excuse for that is that I was taking part in a webchat with Enterprise Nation and 1&1 at the same time, so clearly not concentrating properly on the task in hand. Smack hand for me! :-)

I used my Husqvarna Viking H/class 600E for this though - my poor old machine is sitting unused at the side of my desk. I had a problem with the scissors button not working at one point but that was quickly resolved when I called their customer services and spoke to Hayley West who suggested that I take the base plate off and just check that it was clear of any obstructions. I did that and watched what actually happened when I pressed the scissor button and it worked perfectly. I then put everything back in place and tried it after sewing and again, it worked fine. Hayley clearly has powers beyond her phone voice :-)
I am very impressed with their customer service so far; it's wonderful to have easy access to a British person, who can help with any problems I face. It's all very intuitive though, so I have little to cope with, although I did manage to break a needle the other day and had a dippy fit but it was resolved quickly (they provide spare needles with the machine) and I'm 100% sure that it was a user error which caused that to happen.
These are my very first designs I've embroidered. It's so
easy to move designs on the screen, so that you
make the very best use of the space you have available

Just look at the fab texture you can create with some
stitches it does
Keep an eye out for my next post which hopefully will show you the completed cushion cover.

Take care out there

Saturday 22 June 2013

My new baby

Hello there

Now I have been rather good (well, almost) and controlled my excitement about the new addition to my crafting arsenal - it's a Husqvarna Viking H/Class 600E no less! That's a sewing machine to the uninitiated amongst you :-) Well, no, that's a lie; it's an embroidery machine AND sewing machine all rolled into one AND I love it! We managed to get it for a great price on IdealWorld, which makes it even better.

I knew it was due to be delivered within 48 hours, so I got to cleaning up my room to make space for it on Thursday June 20th. Within less than a minute of Dave Koz starting to play on the cd, to accompany my cleaning up, I heard the dogs bark. When they're inside and bark, it usually means that there's someone at the door (who needs a doorbell with dogs like that in the house?!) Can you imagine the squeal when I opened the door to see a man with this large box in his arms?! It certainly woke him up! :-)

Don't worry Alfie, it won't be in the hall for long!
I then tidied up my room alot quicker than I had been doing.

Within half of hour of setting it up, I had tried out lots of different stitches -
The fonts available to this machine are limitless
as I can do any truetype fonts that my computer has
I've found it a very intuitive machine and I keep squealing with delight at different things I learn about it. More 'oo's' and 'aah's' than you can imagine.  I closed my room window, as the neighbours just don't need any more juicy gossip to spread about me! ;-)

It has great storage in both the sewing arm and the embroidery arm; it does the threading of the bobbin at the touch of a lever, without any messing about with adjusting the movement of the needle. It has the modern day features of a stop/start machine, which means no foot pedal is necessary. It cuts the thread for you when you're finished. You can make the needle stop in the up or the down position). I could go on for pages about how good it is.

I have been looking for a long time for the right machine for me and I'm convinced that I've got it now. I'm sure that it was at a reduced price as there's probably a newer version just come out. I'm not bothered about that. These days, everything is old within the year, as technology is always developing. I'm ready and willing to really get to grips with this machine. I'm also hoping it'll be my inroad into selling items. It just so happens that today, Polly (from the Saturday crafting group I went to a couple of weeks ago and mentioned here)  put on their Facebook page asking if anyone wanted to help share a table at her Church's craft fayre. I have said that I'd be interested, as it sounds the perfect opportunity to share a table and not have the daunting task of filling a whole table myself. It'll also mean that there's someone there to talk to, if I get any nasty horrible customers. It's not until September 21st and I'm sure I'll put a post on about it, so you can hear how I got on after then.

Just look at that! Yum! And look at those marvellous LED lights
making it easier to see what's going on.
I forgot to mention that it also is very easy indeed to thread, which is a joy for someone who's more than likely going to have to admit defeat and get bifocal glasses. Me? Old biddy? I'm afraid it's certainly looking like that.

Anyway, I'm actually going to stop going on about how fab this machine is now (I hope I didn't hear you cheer then! :-) ) and get on with trialling more stuff out. I'm off to get some stabiliser tomorrow, so that I can try the embroidery section again.

Take care out there

Wednesday 19 June 2013

Little monkey

Hello there

Yesterday was my eldest nephew's birthday, so I had wanted to scrap him in a page (that sounds painful and slightly illegal :-) )

First issue was that the layout I was following was Catherine's Moments and memories June layout and I didn't feel inspired to just use the one photo I had in mind at the time, so I got distracted - I know, I hear you; what Diane? Distracted? Never!! :-)

Second issue was that three photos of his younger brother took my attention from the same holiday and I thought they'd fit on the layout well. I was tired after being awake since 3.30 and at work for eight hours from 6am, so I just had to run with it.

I did most of it last night but was called away for our get-together movie watching of Madagascar 3 on Sky premiere. I'm sure it is a great film but I was sat in the most uncomfortable seat (well, the pouffe to be exact) and was falling asleep, so I gave up after half an hour. I finished the page off this morning.

I always have remnants of stuff on my desk and the dark blue card just happened to be one of them, which goes perfectly with Owen's t-shirt and the green polka dot paper was a spare on the top of one of my paper pads. A few die-cuts from Cricut Craftroom basics cartridge and some leaves leftover from some cards I made recently and I was done.

I used the cut-offs from the main photo to hide the
gaps at the top and bottom of the vertical blue panel.
I like this!
I used the negative from the star cuts as a
stencil to improve the backing paper.
I also used that ink on the journalling patch,
which is photo paper that was sitting on my desk
The page, as ever, has much better colour than these photos, so I'm rather happy and I hope that Catherine likes that I've used her layout as inspiration. I'm crafting with her tonight, so I'll soon find out :-)

Take care out there and enjoy your moments and memories, whilst I go off to do some housework and then try this layout with two photos I've now decided to try with my eldest nephew.

I also need to find time to watch Madagascar 3 but I'll have to watch it alone now! :-)

Monday 17 June 2013

Bill Withers would be pleased


Hello there

 Yes, Bill Withers and his song 'lovely day' says it all. On Saturday I had a lovely time with some ladies whom hopefully I will be able to call friends soon. 
The leaves and the swirls are from the Cricut
Home Accents cartridge

I have only known Polly for less than a week. Polly had mentioned on a local Facebook page that she might consider setting up a sewing group, so I commented that I would be interested. This developed into a Facebook chat when Polly told me about a crafting group that she belongs to and it just happened to be meeting on Saturday. I went along and her and the other ladies made me feel very welcome and I spent a very relaxed time there for a few hours.

I mainly did listening and drinking tea but I also did lots of cutting and taking some die cuts off the Cricut mats. I really shouldn't have done them quickly the night before as I had put paper onto new mats, which is never a good idea, as the new mats are too sticky and make peeling the paper off quite tricky. I made large inroads to three cards though and then finished them off at home that night.

The flowers are from the Everything Eleanor Stampin' Up set
and the centre cream background and sentiment background
 is from the Cricut Craftroom basics set


I got to see Polly's wonderful City and Guild's Design and Craft (embroidery) portfolio and Kate's gorgeous coloured cross stitch and another lady did mosaic and Polly was making these really cute bottle top pin cushions. There was quite a range of things being worked on whilst the chat continued. I am seriously considering doing a City and Guild's course myself but I might try the quilting one. They also mentioned a sewing workshop centre in Thornton, Lancashire which is gorgeous too. I looked online and saw that they're running a two day 'Quilt top in a day' course in July; you do the top on one day and the backing and binding on the second day :-)

The first ever cuts with my mini tattered florals dies

Crafting really has helped me to meet the most lovely of people.

Take care out there and appreciate the good people.

Saturday 15 June 2013

Stitching at home

Hello there

Today's post is all about a pillow case cover I made for a friend's daughter, who's into campervans in a big way. I got the material with her in mind, as I couldn't resist. I was just going to make an ordinary cover but then I bought Mandy Shaw's book; Stitch at home and well, I had to do some applique and basic embroidery.

The front is pretty basic but it's the campervans she loves, so not much point in doing much else. 

Whereas my indulgence is on the back.


I love the projects Mandy has in this book, all with houses of various kinds involved. I used to embroider at school and did some quite detailed work for a 15 year old and loved it but I've hardly touched it for donkey's years. My stitching is far from perfect but I loved doing it and even used some embroidery threads I had already in my ancient sewing box. I'm hoping that the teenager who this is for, will like the little caravan too and I know that she likes dogs, so it should be alright. If not, she can either take it off or just always keep it on the back of the pillow. 


I'm looking forward to making more projects out of the book.

Take care out there.

Thursday 13 June 2013

It's not puzzling


Hello there

Last night I went to a craft class run by my friend Helen. I really haven't been in the right mood recently and gave her very late notice that I was going but I'm so glad that I did. She packed 8 of us in her craft room plus herself and still stayed calm, smiley and organised despite quite hefty provocation from the other giggly, talkative ladies :-)

The theme was butterflies and in particular the Stampin' Up swallowtail stamp, as Helen is a demonstrator, as are most of my other crafty friends who attended last night. 

This was the first card we made, which was a great one to quickly get us into the right frame of mind.
Rich razzleberry was the colour of the ink and the
coloured card
We then moved onto one which I have sent off already as a get well soon card for my step-mum, who has unfortunately contracted dvt and definitely deserving of a card to try to lighten up at least a couple of hours, after getting something nice through the post.
Rich razzleberry, island indigo and a
pink colour I can't remember the name of,
 sorry :-)

My favourite of the night was the last one we made due to the intense colours of rich razzleberry, island indigo and tangerine tango. I really loved the way everyone's colouring in of the swallowtail was completely different. It was stamped with craft black Stampin' Up ink and then embossed with black. The background was created by embossing the flower stamp in white first and then brayering over the shiny cardstock. Again everyone's was slightly different dependant on which stamp they chose to emboss and how many times they brayered them.
I don't fuss too much with cutting out the antennae anymore;
I just cut them out as best I can and then quickly run
a matching colour pen over them, so they look perfect.

----------------------------
Those were what we made last night but Helen had given us enough card to make one more card. She put a photo of it up on Facebook for us and blogged about it, so I was able to do that today and I really enjoyed this 'new to me' technique called puzzle piecing. It took me a little while to get my head around it but when I did, it became clear how easy it is and yet effective and millions of possibilities open to you. Have a look at Helen's post for a link to a tutorial on how to achieve this.
Those of you who will look closely, will see that I didn't quite fit my orange layer in brilliantly but I can cope with that. It's my first attempt and I'm happy to put an appropriate sentiment on there when I know what I'm using it for. This is a technique I'll definitely be doing again. 

Take care out there and I hope that you too have friends who can inspire you when you're feeling low.

Sunday 9 June 2013

This is my kinda housework

Hello there

I've been tidying up! Aren't I a good girl? :-)

Maybe not as good as all that, as all I've tidied up are some paper pieces from my desk.

I told you in yesterday's post about a little pile I still had left of a digi kit I had printed. 
Well this morning I have put them to good use and no longer have any left.

I got the last piece into the inside of this card

Couldn't resist the opportunity to use some spray
to create another circle on the envelope 


Tidier desk; time spent enjoying myself and two pretty cards at the ready = RESULT!

Take care out there 

p.s. I got 51 views on my blog yesterday. It might not sound alot to many of you but it's brilliant for me. Many of them were from some site called yandex.ru, so I can only hope that Russian site/company is a reputable one!
I often don't share the cards I make these days as it just adds too much time onto the actual making of the cards themselves but I hope that someone out there enjoys seeing a few occasionally.

Saturday 8 June 2013

Colour scheme

Hello there

I've still got tonnes of stuff on my left hand side of this desk which needs stuff doing to. There's paper packs, cricut mats, glue, paper scraps which I insist on thinking I can use, patchwork pieces waiting to be sewn together; I've even got instructions from the Stampin' Up weekend event I went to a couple of months ago along with a pack to complete some cards. Never mind, I will process them soon enough. Like yesterday for example I completed another scrapbook page with some.


You hopefully will recognise the papers from a layout I did last month using Catherine's layout. I've also made a card with these papers as I love the colours. That's the glory of digi papers; you can just print off as many or as few as you like; as these were 'Inspire club' members' freebies from the Crafter's Companion website.
Another few cards in the making still
The two pages as they appear in the album


These photos are from the same holiday my daughter had as that last page, so it makes for a kind of double page, which I seem to really be getting into - it's a great way to use up excess papers and keeps photos of the same event together.

The journalling was written on some packaging card I had on my desk, so it's in-keeping with the 'naturalness' of the mud theme and it gives a definite purpose to one of the little tickets.

Sometimes the face says it all:

Take care out there and for all you British readers, enjoy the sun whilst it lasts!

P.S Just as I wrote that I looked out of the window to see that the sun has hidden behind the clouds! Hopefully it'll be back soon :-)

Wednesday 5 June 2013

Sunning myself

Hello there/ Ola!

Yes I've been to sunny Spain! Majorca infact and yes, I did have a lovely time and really didn't want to come back at all but back I am. I'm finding it hard getting back into routine, especially of crafting but I've managed to get some done today, albeit a small amount. 
Whilst I was away, I got started on a kit I had bought by Corinne Lapierre - a very cute owl cushion.
This is the photo I put on Facebook
as I felt so content just sat there
sewing the decorative pieces in the sun
Crafting in the sun is really something I should do more of. That means sewing as trying to do paper crafting outside would involve far too much carrying around and paper flying all over the place in the slightest breeze.
I did the sewing in Majorca on our balcony and had a gorgeous view of people by the pool and then out to the lake. A very happy, relaxed, warm feeling to the whole experience.

I had bought the kit in the knowledge that it was going on this holiday with me and luckily a few weeks earlier, I had re-found a portable sewing kit. This had everything in it from scissors to buttons and the pincushion, so very handy indeed for this purpose.

I finished him off today and because he was mainly created in the sun, I took him outside for his photo and very happy he was too :-)
I'm sure I'm going to make more of these owl cushions, as I'll give them as birthday presents for my daughter's friends. It's incredibly easy to make and now I have the template, I can make him in any colours I like. The kit gives you everything you need to make him, even a needle. I added some more stuffing into mine though to give him a more rounded feel. The only change I feel I'd like to make in the future, would be to make the stuffing as a separate cushion inside and make a resealable opening, so that the cushion could be washed more easily. We'll see.
Cute little turned over ears
Even though this owl is a kit, everytime you make one, I'm sure they could have their own little identity, dependent on the fabrics used and exact placement of the pattern pieces. Another alteration I felt I could make, would be to add buttons into the centre of those 6 circles along his base or even replace them with large buttons. I have buttons on the brain at the minute as I bought a lovely pack when I went to Range a couple of weeks ago :-)

Take care out there and try some blanket stitch; it's great therapy :-)
Related Posts Plugin for WordPress, Blogger...